How to Create an Input Message in Excel? (3 Easy Steps)
One of the primary purposes of excel is to make our work effective and efficient. Now, to do that, we need to avoid making fewer mistakes when working with tons of data in excel.
We can insert a message in a data range or column where we might see a message. That will give us direction on what type of data exactly we need to put in.
We can create an input message in excel in the data validation box. To do that, go to the ‘Data’ ribbon, and click on the “Data Validation” option. Or press “Alt + A + V + V.” Then go to the “Input Message” tab and insert your message. And press “Ok.”
We showed this method in detail with pictures step by step. Stay with us to learn more.
What is an Input Message in Excel?
Input message in excel displays one or more instructions before inputting data in the selected cells or range. It can help you make mistakes while inserting data into those cells.
When you are working with tons of data, by inserting input messages in those columns or cells, you can keep your workbook clean.

Now, let’s see how you can make an input message in excel.
How to Create an Input Message in Excel (Step-by-Step)
Creating an input message is pretty straightforward. We can do that in just three steps. Moreover, it will help us to make a clean excel workbook. Let’s get into it.
Step 1: Select the Column or Cells
The first step is to select the column or the data range where you want to display your message.
For example, here is a worksheet of an inventory. As you can see, there is a ‘Rack’ column. Now, there are only nine racks in that inventory. We don’t want to input any wrong rack number in that column.
So we want to input a message so that no one inserts any wrong rack number.
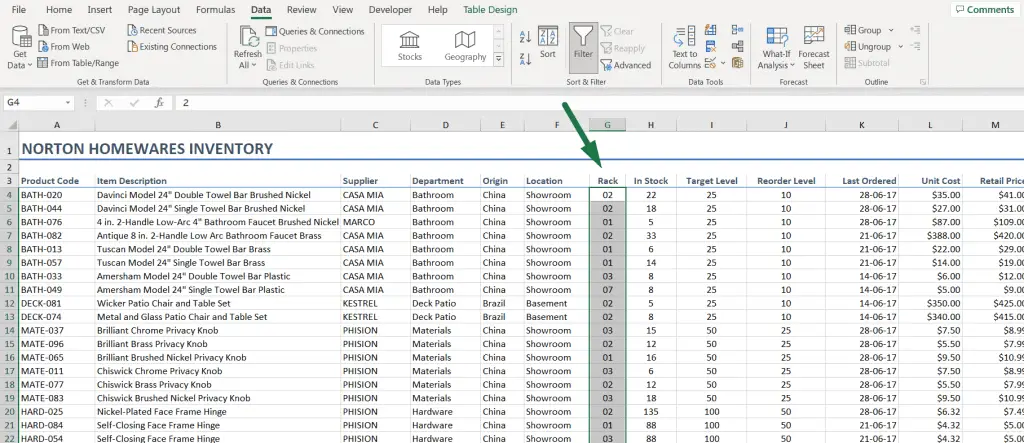
To select that column, click on the ‘Rack’ word if the dataset is in the table format. If not, click on the top cell of that column and then press “Ctrl + Shift + DownArrow (↓). This will select the whole column.
Step 2: Go to the ‘Data’ Ribbon > Click on the ‘Data Validation’ Option.
Now, go to the ‘Data’ ribbon. Click on the ‘Data Validation’ under the ‘Data Tools’ section.
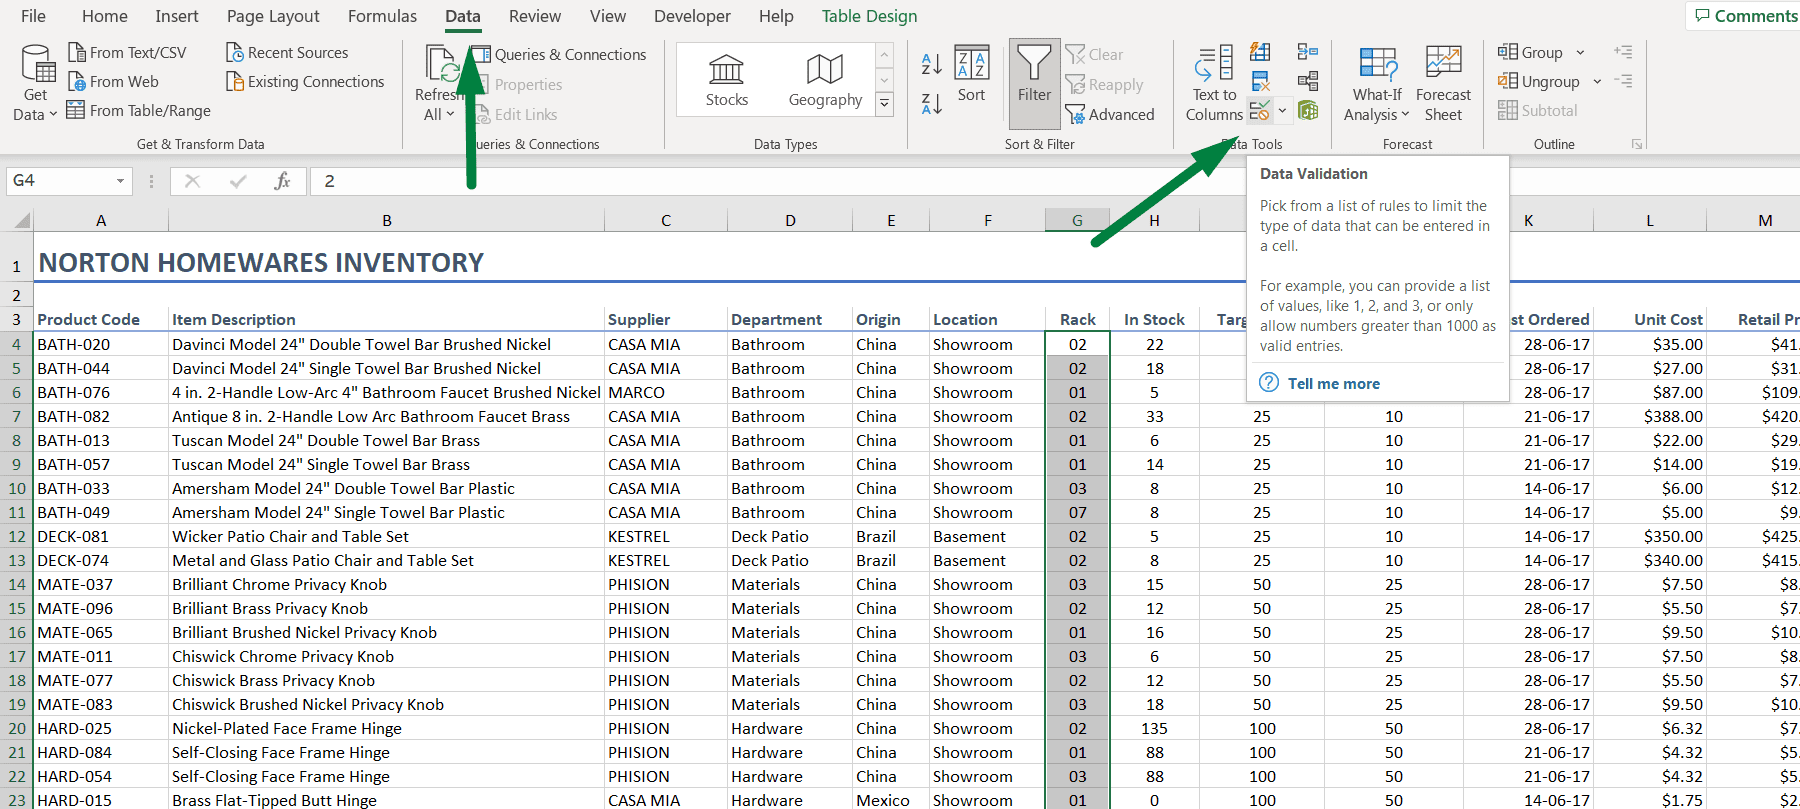
Or you can use a keyboard shortcut key to open the ‘Data Validation’ box. Press “Alt + A + V + V”.
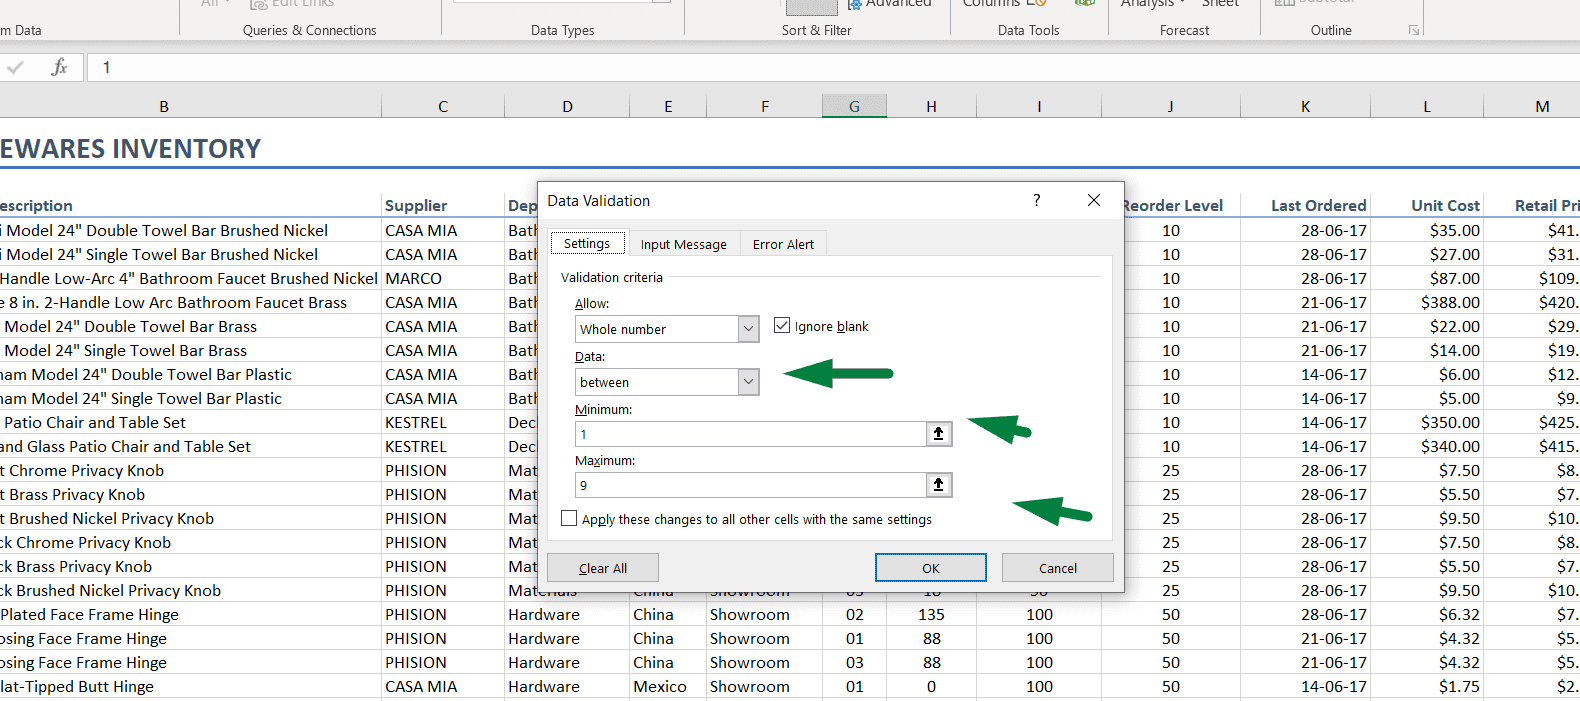
This will open this ‘Data Validation’ box, where you will find three tabs.
In the ‘Settings’ tab, insert your criteria, which type of data you want to allow, and minimum and maximum value as per your convenience.
You can create a drop-down list inserting correct rack numbers if you want. Later, you can also edit or even delete that drop-down list.
Step 3: Create your Message in the ‘Input Message’ Box.
After opening the ‘Data Validation’ box, click on the ‘Input Message’ tab. There you will find these two options,
- Title
- Input Message
In the “Title” box, write down the main title. And in the “Input Message” box, create your message.
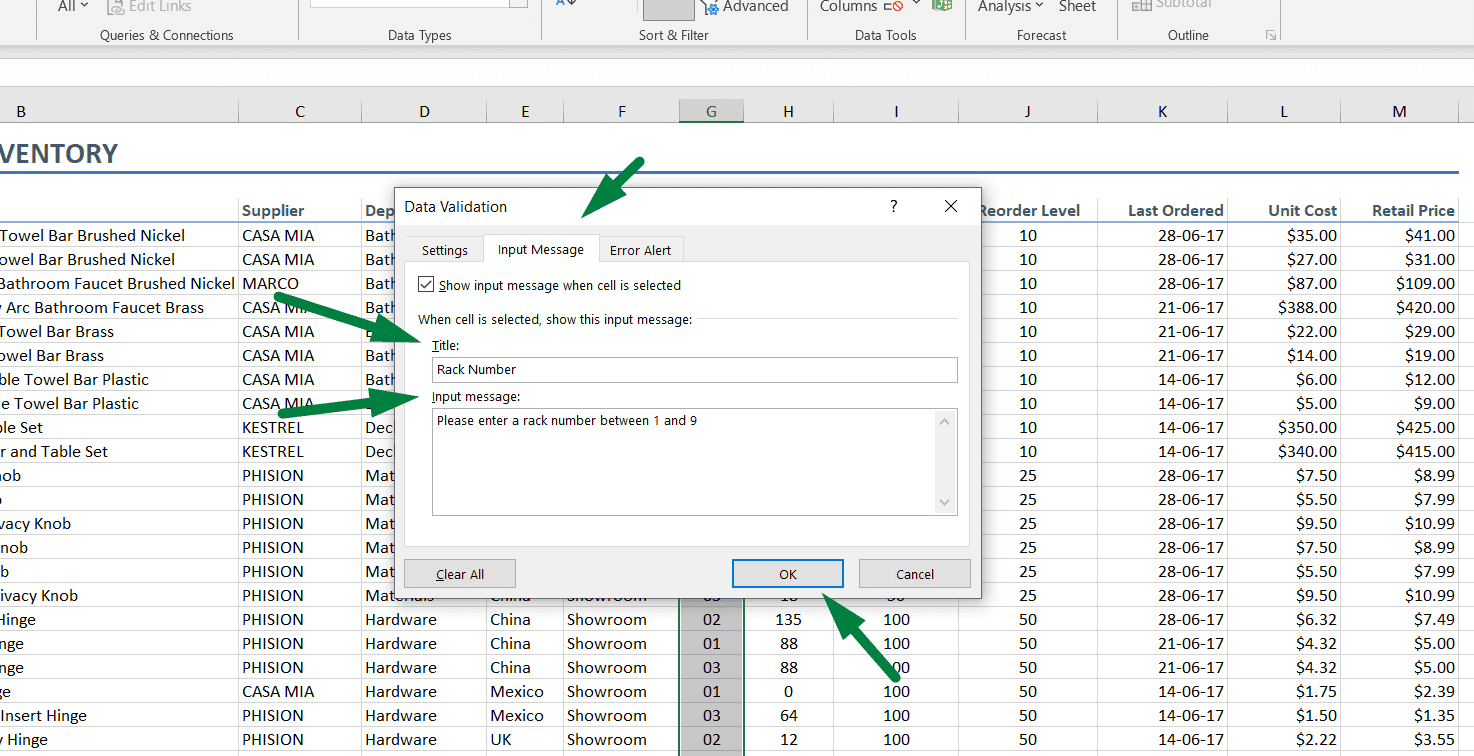
Now, we want to avoid making the mistake of inputting the wrong rack number.
So, in the title box, write “Rack Number,” and as creating an input message, we inserted our message.
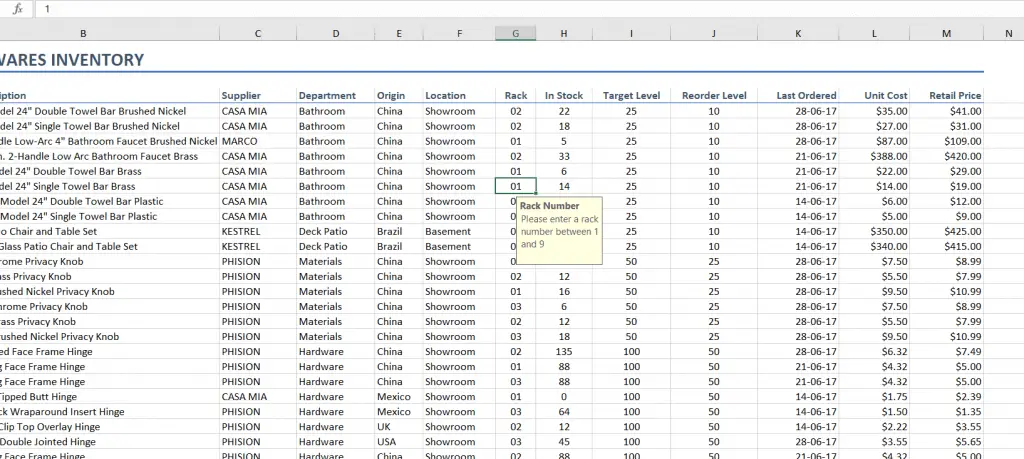
Now, if you click on any cell in that column, Excel will show a message. This way, we can use input message in excel to avoid making mistakes.
But, to altogether avoid inserting wrong information in a cell, we can create a customized error alert in excel.
Summary
As we can see, we can easily avoid making the mistake of inputting wrong info in any cell by creating an input message in just three steps.
- Select the cells/column where you want to display your message.
- ‘Data’ ribbon > click on the ‘Data Validation’ option.
- ‘Input Message’ tab and create a message. Then press ok.
Shortcut Used
Shortcut for opening the data validation tab: Alt + A + V + V.
Conclusion
Here we created an input message in excel in just three steps. This is an effective way to ensure people don’t insert any wrong info in the workbook.
Happy Learning!

Hi! I’m Ahsanul Haque, a graduate student majoring in marketing at Bangladesh University of Professionals. And I’m here to share what I learned about analytics tools and learn from you.