How to change Language in Excel
You can change language in Excel in 3 simple steps. Go to the “File” ribbon > Click on the “Options” > Click on “Language” > Choose your preferred language. If you can not find the language you are looking for, click on “Add a language.” Choose a language, Install it > Click on the “Set as Preferred” > Click “Ok” > Restart the Excel.
Change Language in Excel (Step by Step)
Let us choose a language first. We want to change the language to French in Excel.
We can change language in Excel in 3 steps.
First step: Click on the “File” ribbon.
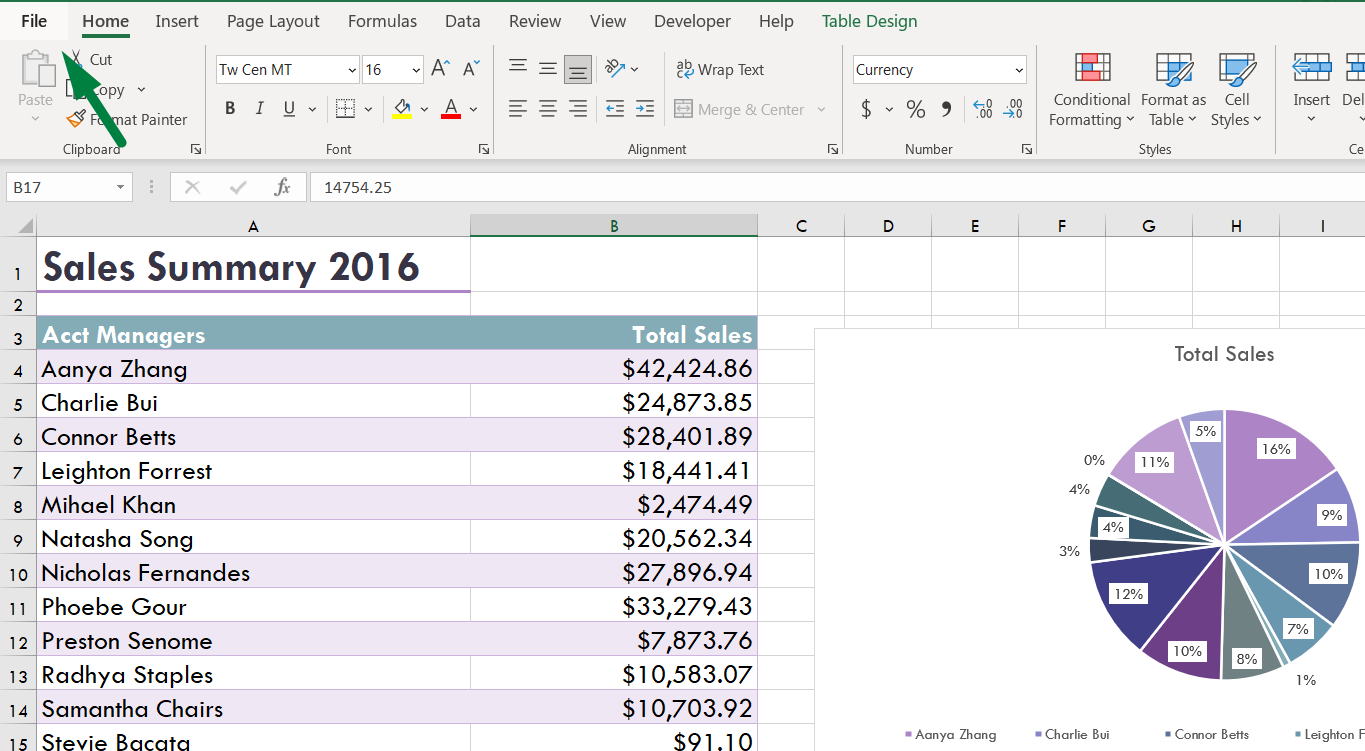
When you click on it, it will open a window where you will find a range of options. At the bottom of those options, you will see an option named “Options.” Click on that.
Step 2: When you click on the “Options”, it will open a box. The title of that box is “Excel Options.” Click on the “Language” option.
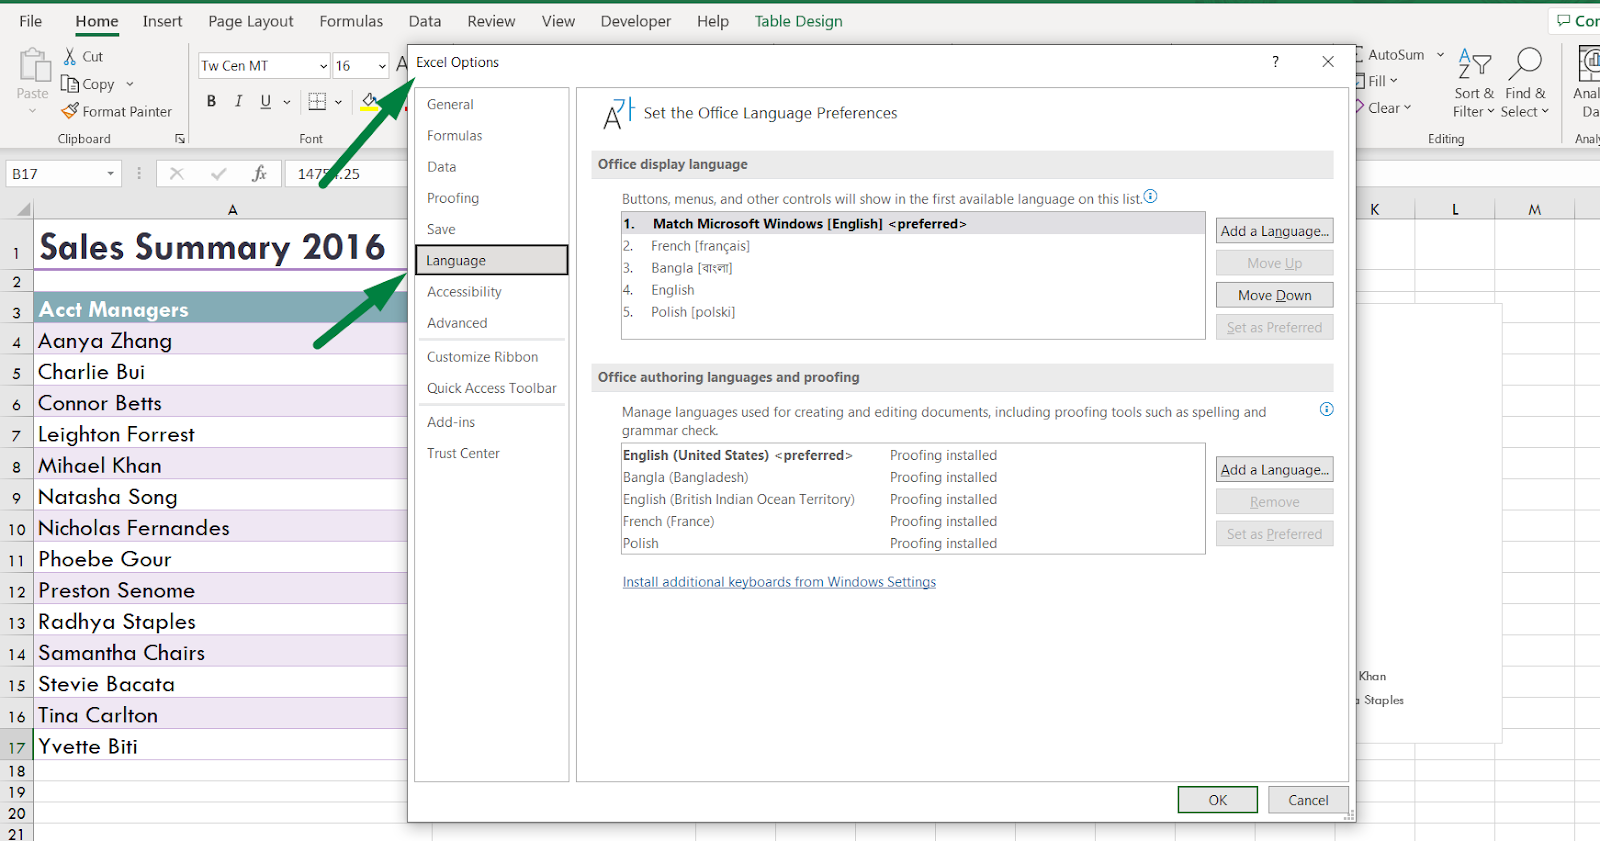
There you will see 2 different options. I am going to explain what these are to you in the later section.
Step 3: Choose your preferred language. We want to change the language to French. So, we are going to choose the option.

Then choose the option “Set as Preferred”. This will take you to the next section named “Office authoring languages and proofing”. We want to set the language to French for this section too.
Click on that option and also click “Set as Preferred.” Excel will open a warning box. It will say that you need to restart your office. So that Excel will be able to take effect the change you made. Click ok.
Close down the Excel app. Here is another shortcut: Press “Ctrl + F4” to close the app. Then again, open Excel. You will see that Excel made the change. It changed the language to French.
What if you do not have the preferred language in that box? Well, you can add the language.
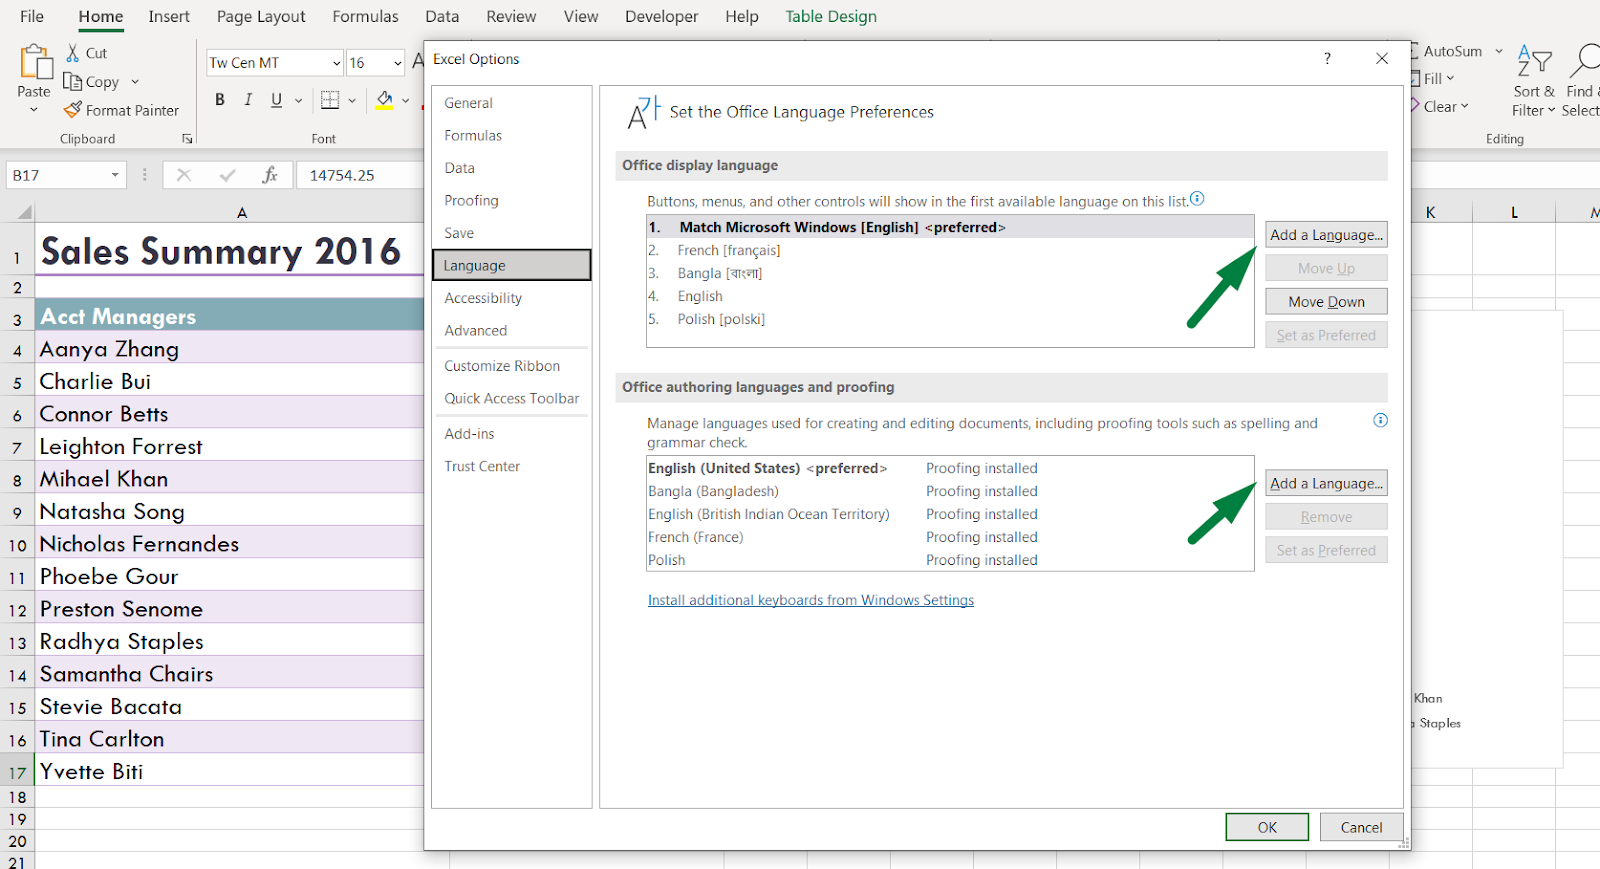
You can add the language you prefer from these options. Click on the “Add a language” and add a language you want. Click on install. Excel or the Office 365 app will download and install the language. Later, when you want to change the language, it will show the installed language.
So, to display the language, follow the same process. Click on the preferred language and click ok.
Read More: How to Set Default Font in Excel
That is all.
I think some explanations are needed for those two options in that box.
Office display language: This is the default office language option. When logged in to the office 365, the language is set the same for all the office apps. So, the language you have preferred will be displayed across all the office apps.
All the options, like buttons, menus, and other controls, will show the 1st available language on the list. Remember, this is only the option for displaying the language. It will show in all the apps in the office 365.
Office authoring languages and proofing: This tool is where you Excel, proofread your content, and make suggestions.
Now, there are a few things that you need to know.
- Excel not only made the change to display the language but also changed the language for formulas. So, the formulas will be shown in your preferred language.
- You might face problems after changing the language, such as formatting numbers or applying comma style, etc.

Hi! I’m Ahsanul Haque, a graduate student majoring in marketing at Bangladesh University of Professionals. And I’m here to share what I learned about analytics tools and learn from you.